Recording Studio
Detailed Multimedia Room Instructions
Devices Available
- HD camera
- Two analogue microphones
- Two external wireless microphones (Rode Wireless Go II)
- Three overhead lighting stands
Step 1: Sign into the computer and open OBS recording application
- Turn on the computer sitting on the floor
- Sign into the computer using your A# and USU password
- On the desktop, open OBS (Recording software)
Step 2: Setting up camera (Only needed if you are doing audiovisual recording)
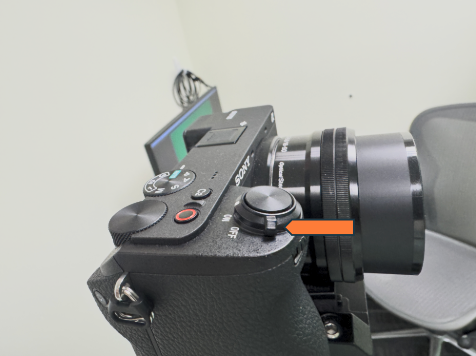
- Locate the power switch on the camera grip (see the picture below)
- Rotate it from Off to On
- Make sure the cable marked with green tape is connected to the camera
- If the camera is on and connected correctly, you should be able to see a preview of the camera feed in OBS
- If you do not see a preview, you may need to add "Video Capture Input" source by clicking on the plus-sign button in the bottom left corner of OBS. After the input is added, you can select the camera as the video input source from the source dropdown menu
- Adjust the tripod for the camera position and shooting angle
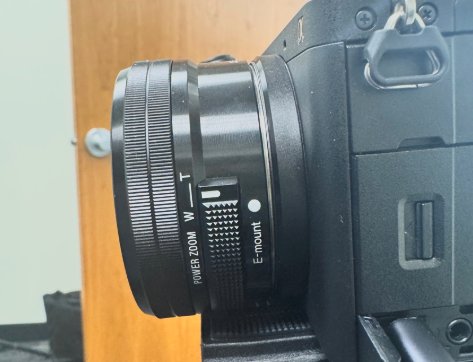
- You can make the camera zoom in and out by pushing the slide on the right side of the camera lens labeled "W__T" up or down (see picture below)
Configure lighting
- (Optionally) Recording with the overhead lighting may result in lower quality results. You can use the stand lights in the multimedia room to ensure the lighting in the room is brighter and more visually appealing
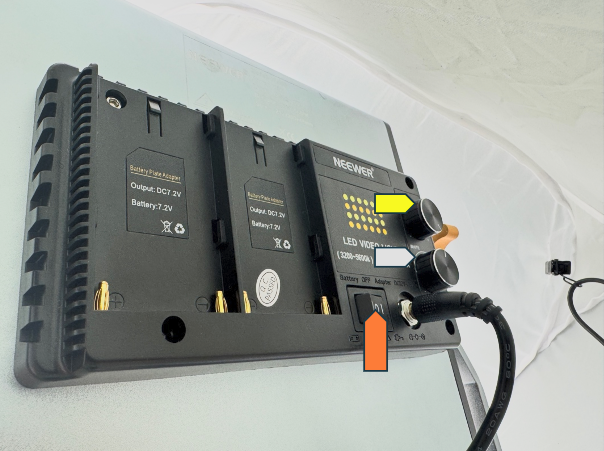
- Turn on the stand lights. This is done by moving the switch on the back of each stand light to the I position. They take a second to power on (orange arrow in the picture below)
- Adjust the color temperature of each light. On the back of each light, there are two dials, one labeled White, and one labeled Yellow. These dials control the intensity and color temperature of the light, and can change the appearance of skin tones, making them feel more natural
Step 3: Setting up audio
Notes: The setup for each type of microphone is different - plan to use the condenser mics that are already set up, unless you'll need more than two mics for your recording
- Large Mic Setup
- Make sure the cable marked with orange tape is connected to both the PC and the "Audient ID4" audio interface box on the table
- To test whether the mics are correctly connected:
- Make sure the audio interface box shows a blue light
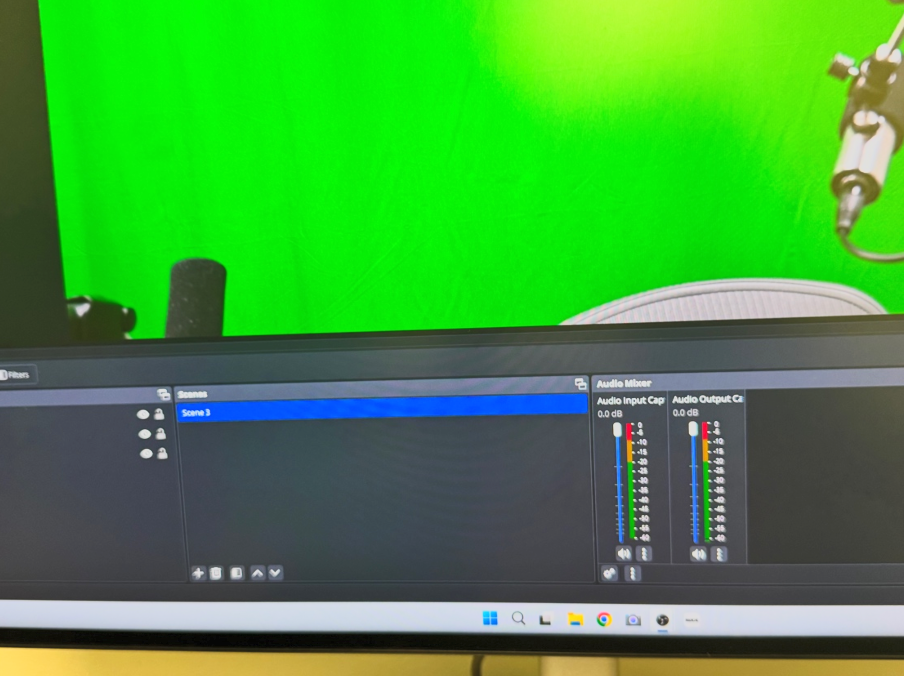
- In OBS, open Audio Input settings (Left side panel in OBS), select Analogue 1+2 (large mics attached to the table)
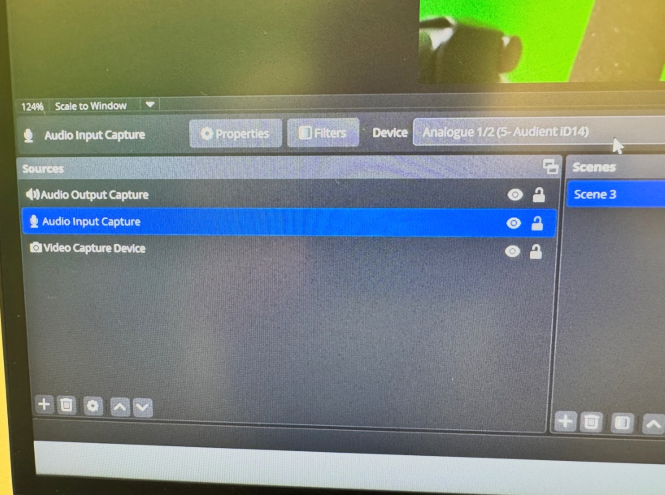
- Once you speak into the mic, the audio mixer in the right side of the screen should show that it is picking up your voice
- You can adjust the volume of the mic by turning the volume knobs on "Audient ID4" device. There is one for each mic
- When speaking into the mic, aim for the audio levels to be in the green -- if it's showing as picking up noise in the yellow and read areas, try turning down the volume knob
- Wireless Mic Setup (If needed)
- To use the small wireless lavaliere mics, connect the receiver (the small black box in the RX slot in the case) to the computer using the provided blue labeled USB C cable and press the button on the top until the small screen shows the status of two microphones
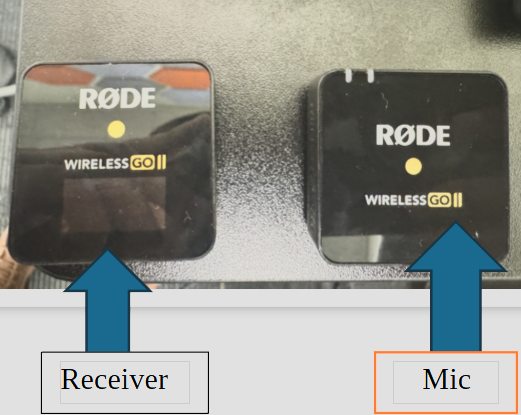

- The screen on the receiver monitors battery and connections levels, you can use it to check the connection status of each mic
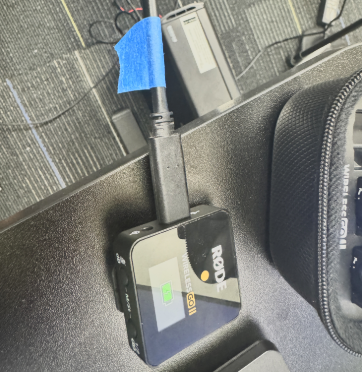
- Power on each mic by holding the button on top until the lights hold blue. You should see the bar on the right side of the screen light up, and the status indicator on the receiver start working

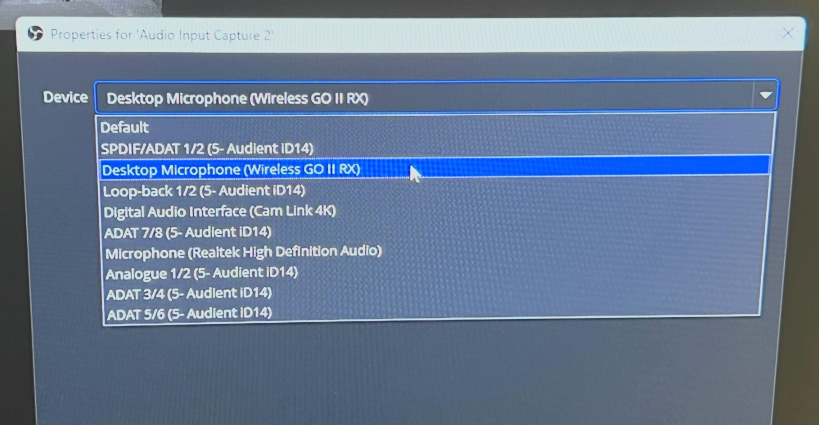
- If the receiver shows audio but the mixer is not showing any output from the "Rode Wireless Go II", you may need to click the 3 dots underneath the level indicator, select "Properties", and change the Device to Desktop Microphone (Wireless Go II RX)
- To monitor the microphones from the headphones, click the gear icon under Audio Mixer and change the "Audio Monitoring" for the appropriate mics to "Monitor and Output"
- For advanced users, you can change preamp settings by clicking the ^ button in the windows taskbar to access the app tray, right clicking on iD, and selecting "Show Mixer"
Additional setup if you are going to record over a presentation or other screen
- To add a source, under Docks on the top left toolbar, enable Sources. This will add a new pane to OBS on the bottom of your screen. The bottom left of this panel has a + icon, press it then select Display Capture or Window Capture. OBS provides a wide variety of ways to capture audio and video, this menu could also be used to connect another camera or include images
- Once a source is selected, OBS will walk you through configuring the various settings. This should add another source over the window. You can click and drag to move each source, and you can resize them try dragging the corners
- You can review this video for more information on how to set up OBS to record over presentation: share presentation in OBS
Step 4: Recording and saving your work
- Press Start Recording (located in the right-hand side panel in OBS)
- You may do a pilot recording to ensure all settings are correct
- After recording, your video recording will be saved in
User right arrow icon Downloads right arrow icon Public right arrow icon Video - You may save your video to an external USB or storage device
- After transferring your file, delete the recording from the computer before logging out
Cleanup
- Turn off the camera and the lights
- Place the headphones on the microphone arm